Sunday, May 31, 2009

A Short Day on Orcas Island

Yesterday we had the opportunity for a brief visit to Orcas Island. Not only is Orcas a stunning getaway but, it's also a big part of my husband's childhood. He spent summers playing in the water, running through the forest and having all sorts of adventures there with his brothers, both in camp (Nor'wester) and out of camp.

We started our day at Teezer's, arriving just in time to snag the last Blackberry & Cream Cheese Pastry and slice of pumpkin bread (no nuts, perfection!). Add to that two blackberry scones and coffee (we brought milk in a sippy for Daughter) and we were set... for the moment.

Following our breakfast, we headed to one of Orcas' rocky beaches to check things out. No starfishes this time around but plenty of tiny crabs and rocks to skip. We did find what appears to be a baby deer skull tucked among the rocks. Next, it was off to lunch. We debated between Bilbo's (not fabulous Mexican), Rose's and Vern's (good steamers & a view but not much else) and decided Cafe Olga was the place. The food is consistently good and Husband can't get enough of their pie. I ordered my usual, the Chicken Cashew Salad on Greens & a cup of their Tomato Basil Soup, Husband ordered the soup and the Salad du jour w/arugula Prosciutto & artichoke hearts and Daughter had just a cup of the soup (all came with good rolls). Lunch was terrific and filling and we took a slice of blackberry pie to go and headed for the park by Cascade Lake for some sun and playtime before heading back home.

Friday, May 29, 2009

My favorite things...

Aquafor
I started using it for the baby's diaper rash, both to prevent and to heal. DD has sensitive skin and I've found it works great to prevent rashes if I use it all over her after bath. I like using it too; I slather my hands and feet with Aquafor before bed and dry skin, be gone!

Extreme Training
Best training facility in Portland. Top notch equipment and fantastic trainers.

Haagen-Daz Fleur de Sel Caramel
You didn't think I worked out just for the fun of it, did you? This is the best ice cream since the demise of my old favorite, Haagen-Daz Cappuccino Commotion.

Olympia Oysters on the half-shell
One of the smallest oysters out there.

White Truffle Cream
Spread on a crusty baguette, decadent!

Semiramis Pastries
Hands down, the best baklava I've ever had in my life. DH and I discovered them in London but it appears the London store is no longer in operation.

I'm not sure what it says about me that so many of my favorite things are food! I should probably mention that I don't eat the above foods on a regular basis (=

Wednesday, May 13, 2009

Carry on... Or don't but, pack like a pro

Packing is my thing. I'm *really* good at it. If you can carry on your luggage versus check, you can arrive later at the airport, you save time when you arrive (no waiting for the carousel!) and you don't have to worry about lost luggage. Carrying on is also immensely convenient if you miss your flight or connection (trust me!).

Some of the items in my arsenal of packing tricks...

Lush Massage Bars instead of lotion. They sell tins to keep them in or you can just use a plastic baggy. When you need lotion, just rub on. Benefits? Besides not having to worry about bottles breaking and lotion ending up everywhere, the bars are exempt from 1-qt ziploc bag status! Another company to try: Lilypad Bathworks
**NOTE: These are scented and some of them have dyes -- these dyes will come off on your clothing so please keep that in mind when you choose your massage bar.
If you want something that's scent-free and good for sensitive skin, try Mustela Hydra-Stick.

Nivea Cream, the small containers, the ones you find in the sample section. I carry one of these in my purse regularly. They are slim, creams don't spill or leak and I've managed to take them through airport security outside of the ziplock bag. I did notice, recently, while going through security in Europe, a picture of the larger-sized Nivea cream in the "don'ts" so keep that in mind.

Colorscience Sun Protection
Mineral SPF 30. Great protection and because it's a powder, ziploc exempt! I have the tinted version (Perfectly Clear) and it doubles as foundation if you only need light coverage.

Eagle Creek Pack-It Folder A lifesaver. It comes in 3 sizes and it not only helps you keep things wrinkle-free but it can halve the space your folded clothes require. I have two and never travel without one.

Monday, May 11, 2009

An oven for a tot!

Daughter has a kitchen set, one that I found at Company Kids a while back, but I found a kind of fun, much less expensive alternative while surfing this evening.

A cardboard box plus a few doodads and you can put together your own play oven!

Here's Martha Stewart's version


Here's another, based on the above version:

Saturday, May 9, 2009

Chocolate Chip Bread (for bread machine)

Chocolate Chip Bread is so yummy. Be prepared to eat the whole loaf in a sitting. No butter necessary. Best served right out of the machine.

1 package yeast
3 c bread flour
2 T brown sugar
2 T white sugar
1 tsp salt
1 tsp cinnamon
4 T soft butter*
1 egg
1 1/4 c milk*
1 c chocolate chips (6-oz package)

Place all ingredients except chocolate chips into the pan in the order listed, select white bread and push "Start". When the machine "beeps" 5 minutes from the end of the second kneading, add the chocolate chips, or if you're lazy, add the chocolate chips with all of the other ingredients.


* This recipe can easily be made dairy-free by substituting vegan butter, unsweetened coconut milk and dark chocolate (be sure to check the ingredients because some contain milk products) for the butter, milk and chocolate chips. Coconut milk gives the bread a denser, moister, more cake-like texture -- a change I like so much, I will continue to use coconut milk in place of dairy even if I do not have to continue my dairy free diet (note 2/6/11)


** If you love coconut, add unsweetened coconut when you add the chocolate chips. Delish! (note 3/8/11)

Wednesday, May 6, 2009

Magic Meatloaf

I know, I don't eat meat. Not much of it anyway. Crispy bacon, Burgerville and a few other forms of meat are all right to me. Despite my distaste for most meat products, I loved my mom's meatloaf growing up. Now I have my own recipe.

1/4 c packed brown sugar
1 tsp prepared mustard
dash hot pepper sauce, optional
3/4 c catsup
Makes enough topping for 1 meatloaf.

1 lb ground hamburger, leanest available (4% fat)*
10-oz frozen spinach, thawed & drained
1/2 c cooked rice (about 1/4 c uncooked)
1 large egg
2/3 c cracker crumbs
1/2 c milk (soymilk works great too)
1/3 c finely chopped onion
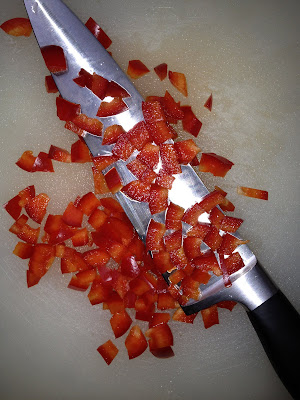
1 finely chopped red pepper
1 finely chopped green pepper
1 tsp salt
1/2 tsp dried sage leaves
1/2 tsp pepper

Preheat oven to 350°.

In small bowl mix brown sugar, mustard, hot pepper sauce, and 1/4 c catsup; set aside (double if you will be cooking both loaves).

In large bowl, mix ground meat, egg, crumbs, milk, onion, red & green peppers, rice, spinach, salt, sage, pepper, and remaining 1/2 c catsup just until well combined but not overmixed. Spoon meat mixture into 2 loaf pans; press down gently.

Spread catsup mixture over top of one loaf. Other loaf may be frozen (Thaw in refrigerator, add catsup mixture to top and cook as indicated). Bake 1 hour and 15 minutes. Let stand 10 minutes before slicing.

Serve with baked potatoes.

Note: This recipe works well with only 1 lb of hamburger (that's typically what I use because that's about what the pkg size is) but does not turn out as well using 2 lbs.

* also good with a combination of ground veal, pork and turkey.

** I've added chopped mushrooms, smoked turkey and more with great results.

Tuesday, May 5, 2009

Chicken Stock & Soup

I've been cooking lately. I think it's a combined result of wanting the baby to eat healthy (aka, not takeout) and my husband really enjoys good food and when he's working late (frequently), I kind of enjoy surprising him with something yummy and homemade.

Until recently, the idea of homemade chicken stock was a bit daunting to me. Partly because I rarely eat meat or poultry so the idea of cooking it was even less appealing. One day a friend suggested roasting a chicken and I tried it after he gave me step by step instructions -- Easy! It seemed a waste not to make stock with the bones so I learned.


Chicken carcass with meat picked off and reserved for later use
1 yellow onion, quartered
1 white onion, quartered
1 red onion, quartered
cloves, to taste (stud 1 onion w them)
1 leek, white part only, quartered
carrots, peeled and cut into large chunks
celery stalks, cut into large chunks
handful of fresh parsley
fresh thyme
sea salt and freshly ground pepper, to taste
1 head of garlic, cloves peeled and smashed

Place all ingredients in large stockpot and cover with water. Heat on med-low for 2-4 hours or longer; the longer stock is cooked, the more flavorful it will be.


Cool. Strain and discard solids. Skim fat off top; to aid in this process, stock can be placed in freezer for an hour or so and fat will rise to the top and solidify for easy removal. Stock can be used immediately or frozen for later use.

To make soup, start with stock and add reserved chicken, frozen corn, chopped fennel bulb, chopped baby bok choy, chopped onion and chopped carrots and celery. Throw in a handful or two of pearl barley. If you like noodles, add them about 10-15 minutes prior to serving so that they won't become mushy. Add minced garlic, sea salt and pepper to taste.

* Some commercial bullions & broths contain casein, a milk protein. Making your own chicken stock and freezing it, helps ensure a supply of dairy-free chicken stock if that's dairy is a concern to you.

Monday, May 4, 2009

Crayons

Besides being a wife, I'm also a mom. I have a small child and she's a pretty big focal point in my life.

Last night we were coloring, while waiting for Husband to come home from picking up the takeout (roasted chicken for him and Salad Nicoise for me -- Daughter shares what she chooses off our plates). I noticed an abundance of broken crayons in her stash. This is no surprise given that she went through a stage where peeling the paper from crayons, then breaking them into small pieces gave her more pleasure than drawing. Nevertheless, I noticed she won't use these tiny gems and they aren't really useful for me to draw with either.

Being a bit of an eco-nut and a little frugal, throwing them away without offering them new life, isn't an option.

I started thinking about melting them into "new" crayons and figured my next best step would be a little Google. The idea of using muffin tins didn't thrill me (boring shape and hello, I cook food in them) and neither did a muddy mess of colors blending together. I found two sites that appealed to me for various reasons:
Chica and Jo
and
Make and Takes

If you don't bother to read the comment section, take care not to microwave the crayons as suggested in the 2nd link. Apparently it can lead to problems. No, I haven't tried it but there's no reason to risk destroying an expensive piece of kitchen equipment when there are other options. An exercise in a little patience is good for all of us.

The first site provides ideas for keeping the colors separate and better shapes than a muffin tin provides. The second provides time and temperature information for cooking, which I appreciate. I found temperature / time information on other sites but many of them suggested higher temperatures and longer times. I figure, why use a higher temp than I need, especially when dealing with wax.

Recycling crayons seems like a great idea for elementary school teachers, if they aren't already doing something like it. Given the scarcity of supplies teachers experience with these days and the abundance of broken crayons they probably end up with, recycling crayons fixes two problems IMO. If I were a teacher doing this project, I'd probably invest in some cheap muffin tins for this. True, the shapes aren't as exciting but teachers have access to a lot more crayons than most of us and really, how much time do they want to spend on this project? Sometimes practicality wins over fancy. Same reason I usually wear flats or tennies when going to the grocery store instead of a fabulous pair of Christian Louboutins or Giuseppe Zanottis.

This also might be a fun project for older kids. I don't feel comfortable yet with hot crafts around my daughter but as she becomes more predictable and has a better understanding of safety, spooning melted crayon into molds could be 15 minutes of entertainment one afternoon. Or less, depending on how little time it takes her to move on to the next big thing...
Update:
I made my first batch of triangle crayons the other day. A couple of notes...

*Don't put the silicone ice cube molds from Ikea in the oven. I thought it would be an easy shortcut since I have silicone cooking pans but they are not the same and the ice cube molds started to smoke. Thankfully, I caught it before there was any damage.

*Different brands of crayons turn out different end product. Crayola works the best, melting quickly and turning out a product that does not leave color on little fingers. Some brands don't melt at all, or at least not in a way that worked easily. I suppose grating would aid in the melting but that takes more time than it's worth for most people.

*Daughter LOVED the triangle shape. Day 3 of hours of play; much more interest than she's ever shown in regular crayons. ...Must.resist.temptation.to.melt.all.crayons...